전체 글
- JSONView설치 2022.12.18
- J-Query 기초 2022.12.14
- 손흥민팬명록 만들기 (HTML+CSS만!) 2022.12.09
- 모바일 처리 2022.12.08
- 꿀팁이모티콘 받기 2022.12.08
- 이미지 어둡게 만들기 2022.12.08
- 가운데 정렬 display:flex (4콤보) 2022.12.07
- 부트스트랩 예쁜 CSS모음집 2022.12.07
JSONView설치
2022. 12. 18. 21:49
J-Query 기초
2022. 12. 14. 03:10
JQuery 란?
HTML의 요소들을 조작하는, 편리한 Javascript를 미리 작성해둔 것. 라이브러리!
Javascript로도 모든 기능(예 - 버튼 글씨 바꾸기 등)을 구현할 수는 있지만,
1) 코드가 복잡하고,
2) 브라우저 간 호환성 문제도 고려해야해서,
jQuery라는 라이브러리가 등장
Ex)
→ Javascript로 길고 복잡하게 써야 하는 것을
document.getElementById("element").style.display = "none";
→ jQuery로 보다 직관적으로 사용가능!
$('#element').hide();
JQuery CDN
https://www.w3schools.com/jquery/jquery_get_started.asp
JQuery 사용하기위해..
<head> 와 <head> 사이에 아래값 임포트하기!
<script src="https://ajax.googleapis.com/ajax/libs/jquery/3.5.1/jquery.min.js"></script>// 1. input-q1의 입력값을 가져온다. $('# .... ').val() 이렇게!
// 2. 만약 입력값이 빈칸이면 if(입력값=='')
// 3. alert('입력하세요!') 띄우기
// 4. alert(입력값) 띄우기function q1() {
let val = $('#input-q1').val()
if(val==''){
alert('입력하세요.')
}else{
alert(val)
}
}// 1. input-q2 값을 가져온다.
// 2. 만약 가져온 값에 @가 있으면 (includes 이용하기 - 구글링!)
// 3. info@gmail.com -> gmail 만 추출해서 ( .split('@') 을 이용하자!)
// 4. alert(도메인 값);으로 띄우기
// 5. 만약 이메일이 아니면 '이메일이 아닙니다.' 라는 얼럿 띄우기function q2() {
let email = $('#input-q2').val()
if (email.includes('@')){
alert(email.split('@')[1].split('.')[0])
}else{
alert('이메일이 아닙니다.')
}
}// 1. input-q3 값을 가져온다. let txt = ... q1, q2에서 했던 걸 참고!
// 2. 가져온 값을 이용해 names-q3에 붙일 태그를 만든다. (let temp_html = `<li>${txt}</li>`) 요렇게!
// 3. 만들어둔 temp_html을 names-q3에 붙인다.(jQuery의 $('...').append(temp_html)을 이용하면 굿!)
function q3() {
let name = $('#input-q3').val()
let temp_html = `<li>${name}</li>`
$('#names-q3').append(temp_html)
}// 1. names-q3의 내부 태그를 모두 비운다.(jQuery의 $('....').empty()를 이용하면 굿!)
function q3_remove() {
$('#names-q3').empty()
}<!doctype html>
<html lang="ko">
<head>
<meta charset="UTF-8">
<title>jQuery 연습하고 가기!</title>
<!-- JQuery를 import 합니다 -->
<script src="https://ajax.googleapis.com/ajax/libs/jquery/3.4.1/jquery.min.js"></script>
<style type="text/css">
div.question-box {
margin: 10px 0 20px 0;
}
</style>
<script>
function q1() {
  let val = $('#input-q1').val()
  if(val==''){
    alert('입력하세요.')
  }else{
    alert(val)
  }
}
function q2() {
  let email = $('#input-q2').val()
  if (email.includes('@')){
    alert(email.split('@')[1].split('.')[0])
  }else{
    alert('이메일이 아닙니다.')
  }
  }
function q3() {
  let name = $('#input-q3').val()
  let temp_html = `<li>${name}</li>`
    $('#names-q3').append(temp_html)
    }
function q3_remove() {
  $('#names-q3').empty()
    }
</script>
</head>
<body>
<h1>jQuery + Javascript의 조합을 연습하자!</h1>
<div class="question-box">
<h2>1. 빈칸 체크 함수 만들기</h2>
<h5>1-1. 버튼을 눌렀을 때 입력한 글자로 얼럿 띄우기</h5>
<h5>[완성본]1-2. 버튼을 눌렀을 때 칸에 아무것도 없으면 "입력하세요!" 얼럿 띄우기</h5>
<input id="input-q1" type="text" /> <button onclick="q1()">클릭</button>
</div>
<hr />
<div class="question-box">
<h2>2. 이메일 판별 함수 만들기</h2>
<h5>2-1. 버튼을 눌렀을 때 입력받은 이메일로 얼럿 띄우기</h5>
<h5>2-2. 이메일이 아니면(@가 없으면) '이메일이 아닙니다'라는 얼럿 띄우기</h5>
<h5>[완성본]2-3. 이메일 도메인만 얼럿 띄우기</h5>
<input id="input-q2" type="text" /> <button onclick="q2()">클릭</button>
</div>
<hr />
<div class="question-box">
<h2>3. HTML 붙이기/지우기 연습</h2>
<h5>3-1. 이름을 입력하면 아래 나오게 하기</h5>
<h5>[완성본]3-2. 다지우기 버튼을 만들기</h5>
<input id="input-q3" type="text" placeholder="여기에 이름을 입력" />
<button onclick="q3()">이름 붙이기</button>
<button onclick="q3_remove()">다지우기</button>
<ul id="names-q3">
<li>세종대왕</li>
<li>임꺽정</li>
</ul>
</div>
</body>
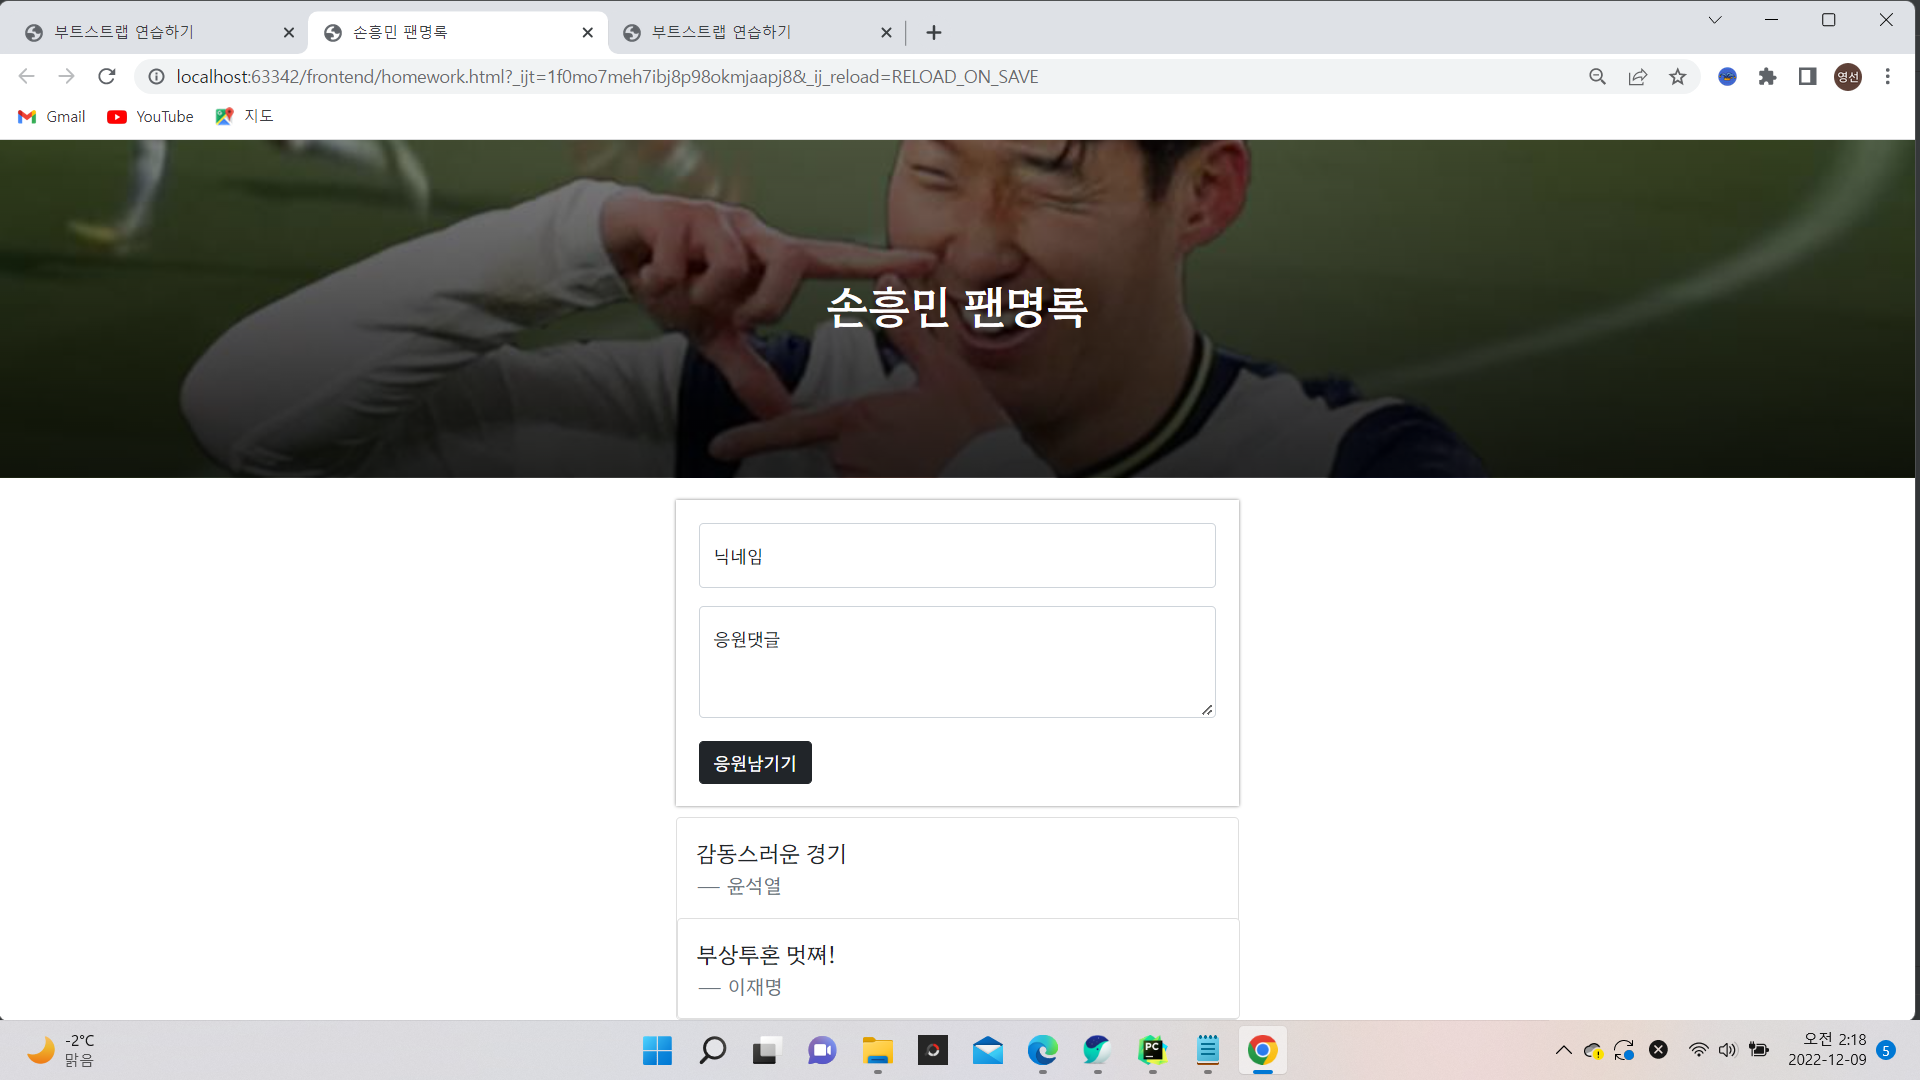
</html>손흥민팬명록 만들기 (HTML+CSS만!)
2022. 12. 9. 02:23
자바스크립트는 아직 모름으로
작동은 아무것도 안되지만..(1주차 숙제)
이번 월드컵을 본 이후로 손흥민에게 깊은 감동을 받아
손흥민 팬명록을 만들어보았다.
<!doctype html>
<html lang="en">

<head>
    <meta charset="utf-8">
    <meta name="viewport" content="width=device-width, initial-scale=1, shrink-to-fit=no">

    <link href="https://cdn.jsdelivr.net/npm/bootstrap@5.0.2/dist/css/bootstrap.min.css" rel="stylesheet"
        integrity="sha384-EVSTQN3/azprG1Anm3QDgpJLIm9Nao0Yz1ztcQTwFspd3yD65VohhpuuCOmLASjC" crossorigin="anonymous">
    <script src="https://ajax.googleapis.com/ajax/libs/jquery/3.5.1/jquery.min.js"></script>
    <script src="https://cdn.jsdelivr.net/npm/bootstrap@5.0.2/dist/js/bootstrap.bundle.min.js"
        integrity="sha384-MrcW6ZMFYlzcLA8Nl+NtUVF0sA7MsXsP1UyJoMp4YLEuNSfAP+JcXn/tWtIaxVXM"
        crossorigin="anonymous"></script>

    <title>손흥민 팬명록</title>
    <link href="https://fonts.googleapis.com/css2?family=Hahmlet:wght@400;500;600;700;800&display=swap" rel="stylesheet">

    <style>
        *{font-family: 'Hahmlet', serif;}
        .mytitle{
            width: 100%;
            height: 300px;

            background-position: center 40%;
            background-size: cover;

            background-image: linear-gradient(0deg, rgba(0, 0, 0, 0.8), rgba(0, 0, 0, 0.5)),url("https://www.1koreanpost.com/uploads/news/posts/%EC%86%90%ED%9D%A5%EB%AF%BC-100%ED%98%B8%EA%B3%A8-web2.jpg");

            color: white;

            display: flex;
            flex-direction: column;
            justify-content: center;
            align-items: center;

        }
        .fight{
            max-width: 500px;
            width: 90%;
            margin: 20px auto 10px auto;
            box-shadow: 0px 0px 3px 0px gray;
            padding: 20px;
        }

        .fight> button{
            margin-top: 20px;
        }
        .card{
            width: 500px;
            margin:auto;
        }

    </style>
</head>

<body>
<div class="mytitle">
      <h1>손흥민 팬명록</h1>
</div>

    <div class="fight">
        <div class="form-floating mb-3">
            <input type="email" class="form-control" id="floatingInput" placeholder="name@example.com">
            <label for="floatingInput">닉네임</label>
        </div>
        <div class="form-floating">
            <textarea class="form-control" placeholder="Leave a comment here" id="floatingTextarea2"
                      style="height: 100px"></textarea>
            <label for="floatingTextarea2">응원댓글</label>
        </div>
            <button type="button" class="btn btn-dark">응원남기기</button>
    </div>


    <div class="card">
        <div class="card-body">
            <blockquote class="blockquote mb-0">
                <p> 감동스러운 경기</p>
                <footer class="blockquote-footer">윤석열</footer>
            </blockquote>
        </div>
        <div class="card">
            <div class="card-body">
                <blockquote class="blockquote mb-0">
                    <p> 부상투혼 멋쪄!</p>
                    <footer class="blockquote-footer">이재명</footer>
                </blockquote>
            </div>
        </div>
    </div>
</body>

</html>
역시 두번째 복습강의 들으니 먼가 술술 풀리고 이제야 이해가 가는것 같다.

모바일 처리
2022. 12. 8. 23:10
max-width: 1200px;
width: 95%;
max-width: 500px;
width: 95%;화면이 삐져나가지 않도록 크기를 잡아줄수 있다!
꿀팁이모티콘 받기
2022. 12. 8. 22:28
이미지 어둡게 만들기
2022. 12. 8. 22:03
background-image: linear-gradient(0deg, rgba(0, 0, 0, 0.5), rgba(0, 0, 0, 0.5)),url("");0.5를 바꿔가며 이미지 어두움 조절가능!
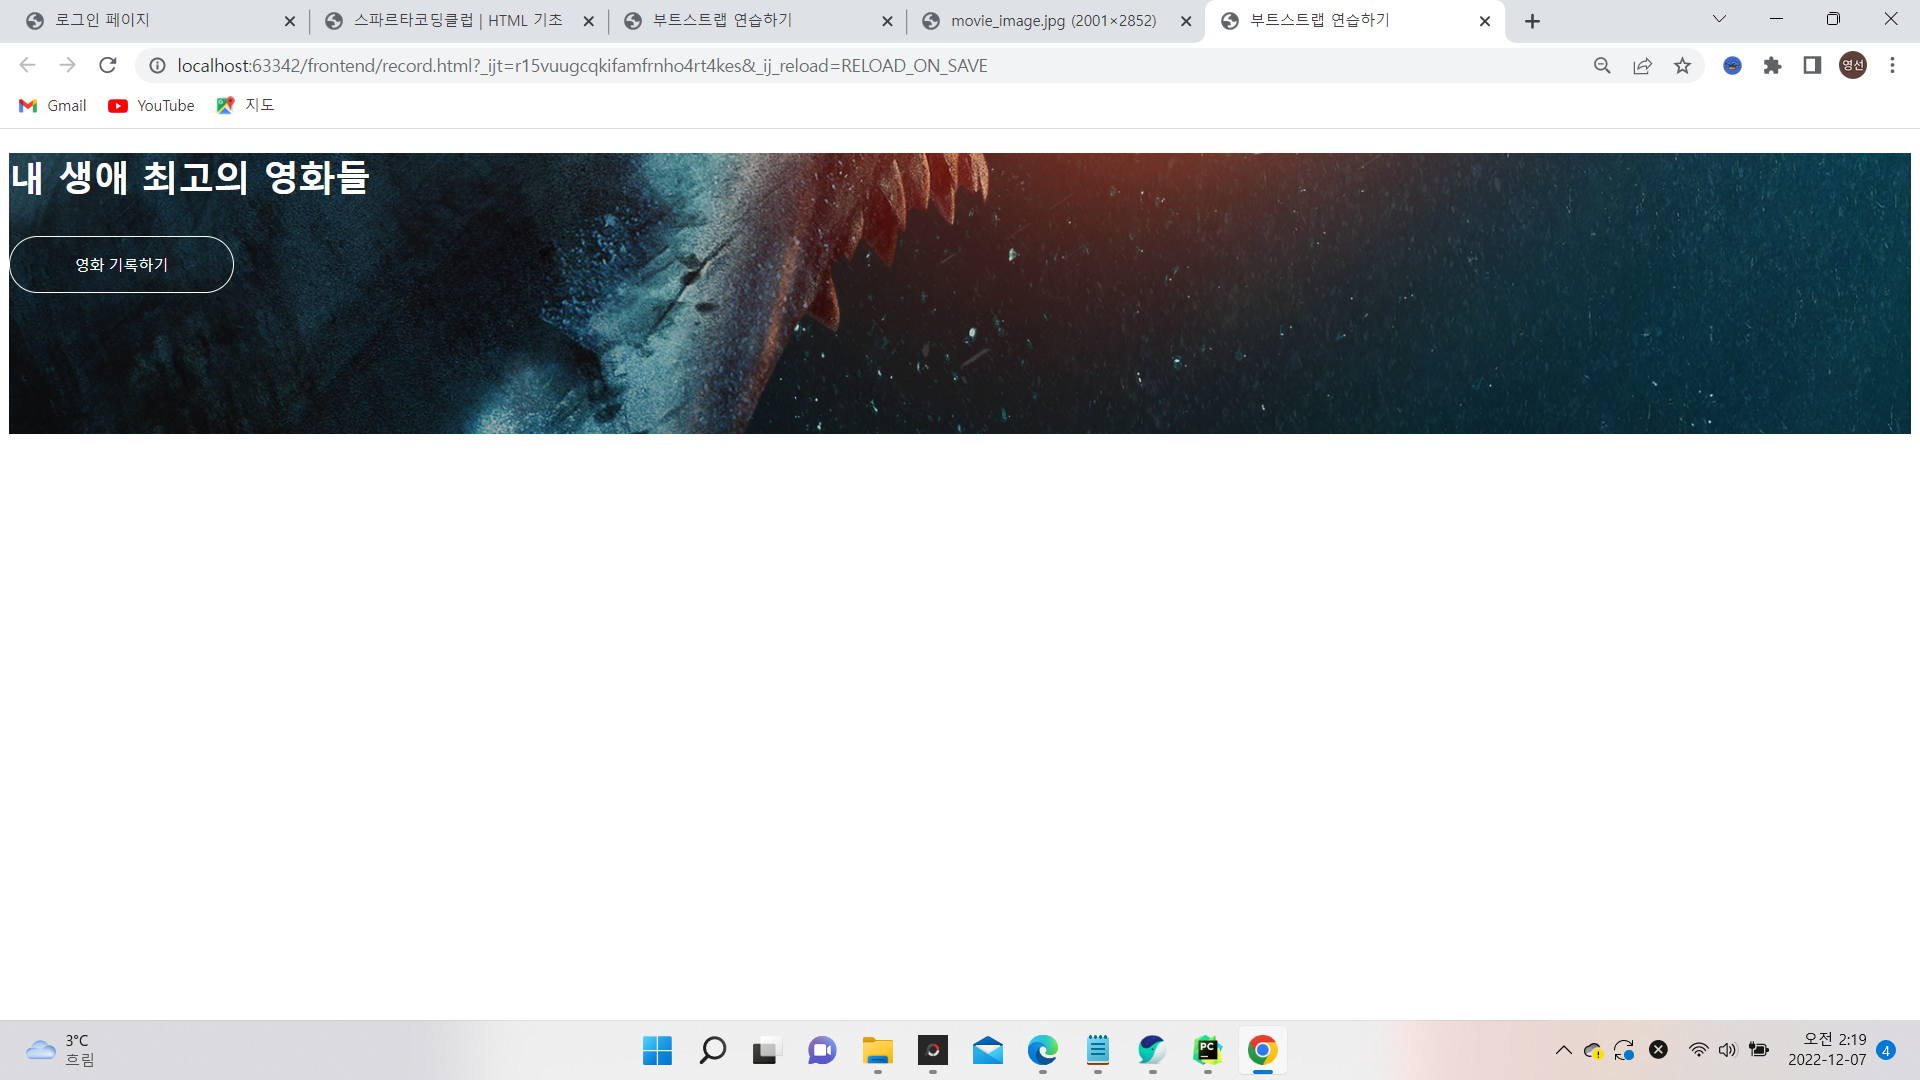
가운데 정렬 display:flex (4콤보)
2022. 12. 7. 02:19
display: flex;
flex-direction: column;
justify-content: center;
align-items: center;
<!DOCTYPE html>
<html lang="en">
<head>
    <meta charset="UTF-8">
       <title>부트스트랩 연습하기</title>

    <style>
        .mytitle{
            color: white;
            height: 250px;
            width: 100%;

            background-color: green;
            background-image: url("https://movie-phinf.pstatic.net/20210715_95/1626338192428gTnJl_JPEG/movie_image.jpg");
            background-position: center;
            background-size: cover;

            display: flex;
            flex-direction: column;
            justify-content: center;
            align-items: center;


        }
        .mytitle>button{
            width: 200px;
            height: 50px;

            background-color: transparent;
            color: white;
            border-radius: 50px;
            border: 1px solid white;

            margin-top: 10px;
        }
        .mytitle>button:hover {
            border: 3px solid white;
        }
    </style>
</head>

<body>
  <div class="mytitle">
      <h1>내 생애 최고의 영화들</h1>
      <button> 영화 기록하기</button>
  </div>

</body>

</html>
부트스트랩 예쁜 CSS모음집
2022. 12. 7. 00:58
bootstrap (부트스트랩)
예쁜 CSS를 미리 모아둔 것
<!doctype html>
<html lang="en">

<head>
    <meta charset="utf-8">
    <meta name="viewport" content="width=device-width, initial-scale=1, shrink-to-fit=no">

    <link href="https://cdn.jsdelivr.net/npm/bootstrap@5.0.2/dist/css/bootstrap.min.css" rel="stylesheet"
        integrity="sha384-EVSTQN3/azprG1Anm3QDgpJLIm9Nao0Yz1ztcQTwFspd3yD65VohhpuuCOmLASjC" crossorigin="anonymous">
    <script src="https://ajax.googleapis.com/ajax/libs/jquery/3.5.1/jquery.min.js"></script>
    <script src="https://cdn.jsdelivr.net/npm/bootstrap@5.0.2/dist/js/bootstrap.bundle.min.js"
        integrity="sha384-MrcW6ZMFYlzcLA8Nl+NtUVF0sA7MsXsP1UyJoMp4YLEuNSfAP+JcXn/tWtIaxVXM"
        crossorigin="anonymous"></script>

    <title>부트스트랩 연습하기</title>
</head>

<body>
  <p><button type="button" class="btn btn-primary">로그인하기</button><p/>
  <p><button type="button" class="btn btn-danger">Danger</button><p/>


</body>

</html>
부트스트랩 컴포넌트 5.0
https://getbootstrap.com/docs/5.0/components/buttons/
Buttons
Use Bootstrap’s custom button styles for actions in forms, dialogs, and more with support for multiple sizes, states, and more.
getbootstrap.com

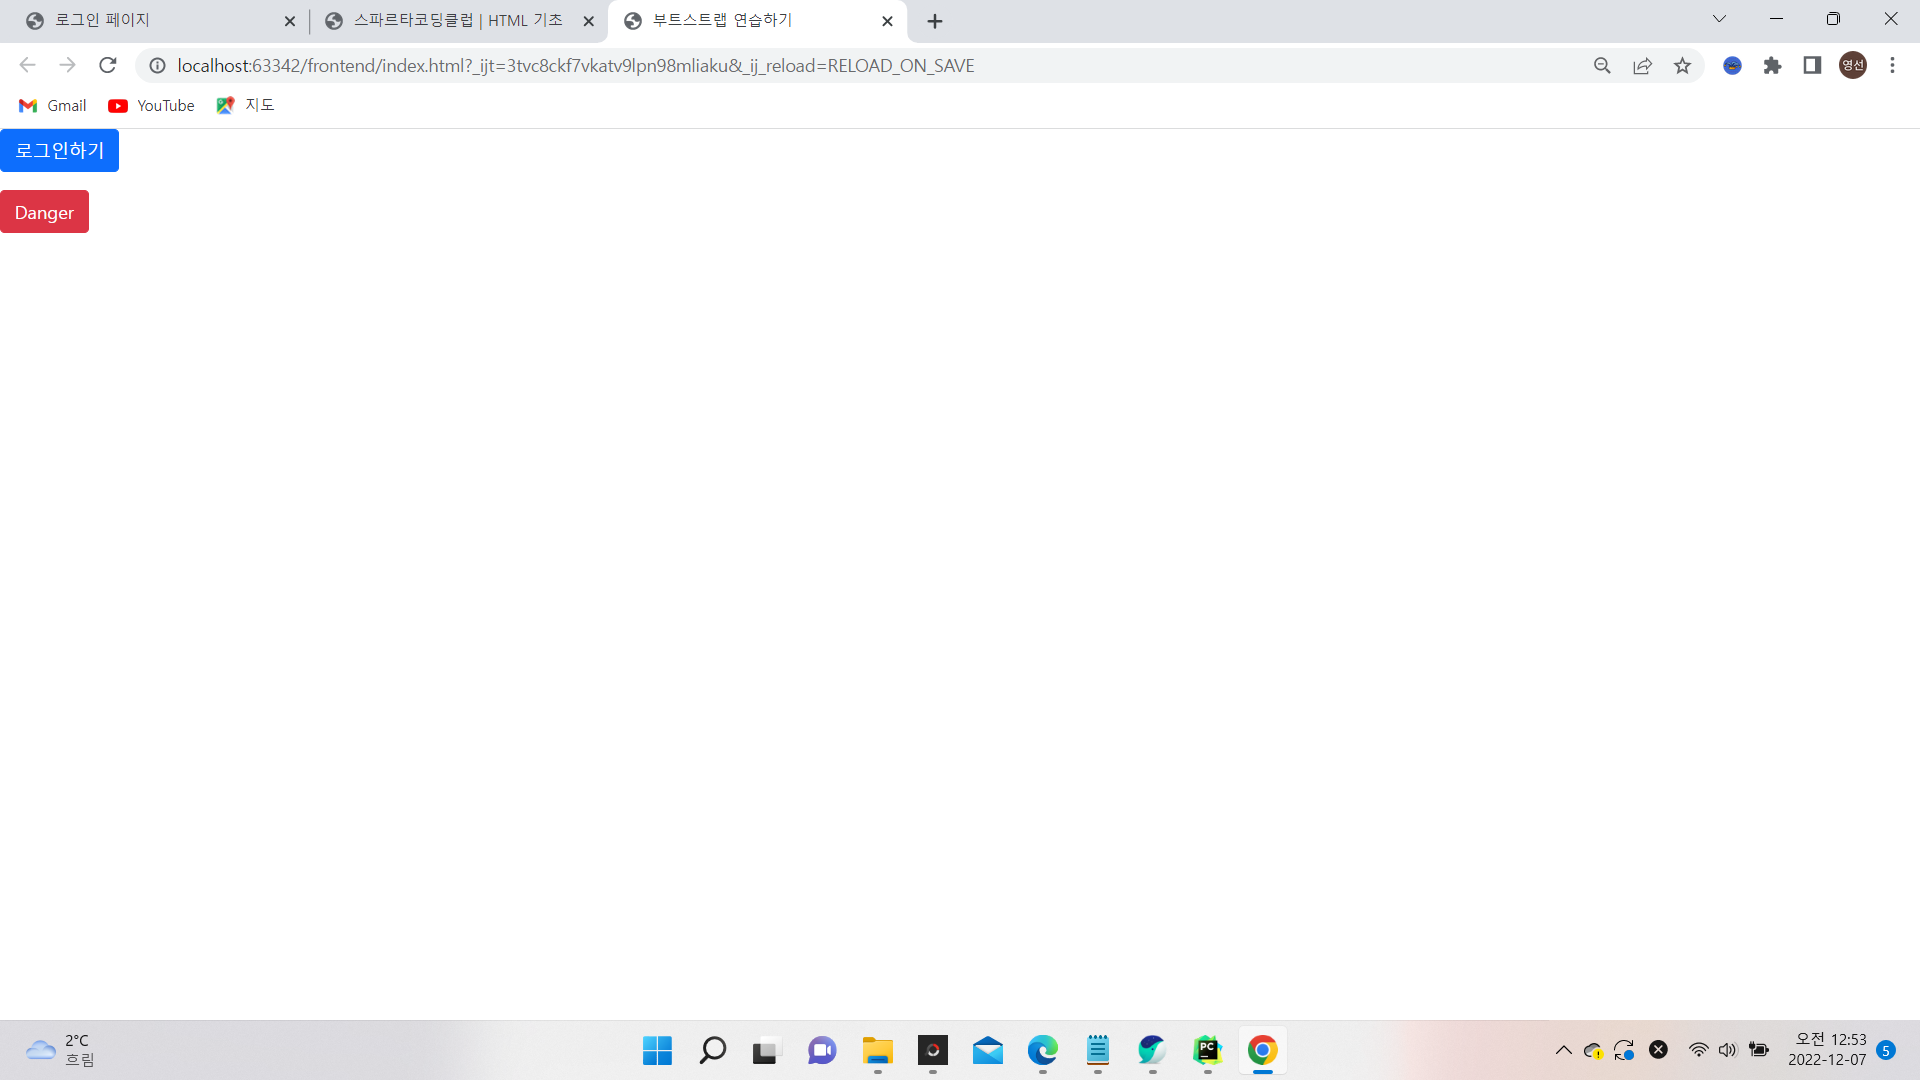
이렇게 이쁜 버튼 탄생!!
나는 왜 <p>태그에 넣었지~???